When I got married, I did not know I would be gaining a father-in-law who loves chocolate as much as I do (if not more)! One day we were talking about dessert, because what else is there to talk about, and he offered to share his mom’s fudge recipe.
I know, WHOA – family recipe status – OKAYYY, go me. It was then I knew I’d been accepted into the fold.
That moment was exciting, but more than anything it gave me a healthy dose of anxiety. It meant a lot that I was being trusted to receive a family recipe but my over-analytical self also felt like it meant I’d be a bad daughter-in-law if I messed this up.
Before I could chicken out of making a family recipe, I went home to try it. I busted out my Grandma’s candy thermometer, got the ingredients together and made that fudge. IT WAS DELICIOUS!
Honestly, I was scared the entire time. I was waiting on it to come to a soft-ball stage and I was certain I wasn’t doing it right. I mean, what even is soft-ball stage. That required some googling. As it turns out, soft-ball stage is a stage in candy-making where if you drop a small amount of your fudge into a bowl of ice water it will hold the shape of a soft-ball if you run it between your fingers. This happens somewhere between 234°-240°F (112-115°C). Thanks Britannica for teaching me. My thermometer calls it about 238°F but my grandma’s says 235°F.
I have good news – you don’t have to keep a bowl of ice water beside your stovetop if you’re making candy – you can buy a candy thermometer which is specially marked with the different stages of candy! However, for the sake of surety, it’s best to use the cold water test AND a thermometer. I know, I know. That’s a lot to do BUT you know that saying “trust but verify”, it’s true for thermometers, too!
One thing to do before you make a candy, check that your thermometer is working right. How do I do that? Well, I pull out my lovely electric kettle and boil a bit of water then pour it in a cup and place the thermometer in it. In North America, boiling water is 212°F so that is what I’m expecting my thermometer to be reading!
I finished the fudge and presented it to my father-in-law later that day. Do you know what happened when he tasted that fudge? Well besides me waiting anxiously to hear what he thought of course. As I waited, I watched him intently and saw tears come to his eyes. I knew in that moment, I’d made his mom proud.
Since that time, I’ve made fudge for him every Christmas. I still feel the same anxiety every time I make it because of the importance of this fudge to him, truthfully. Maybe one day I’ll get over that, who knows.
Unfortunately, this Christmas season my Grandma’s candy thermometer broke. While it was the old mercury type of thermometer and I didn’t love it with my whole heart, I did love her with my whole heart so it felt like I lost a piece of her when I lost her candy thermometer. She taught me one final lesson with that thermometer though – stir gently with metal utensils near thin glass. Seems obvious, I know, but fudge gets to boiling and I couldn’t quite see what I was doing – shame on me, I know.
Don’t worry, I didn’t serve any of the fudge that got broken glass in it and no, I didn’t touch the mercury. Thanks, Mrs. Gerber, you were a great science teacher.
Luckily, my mom happened to be at my house playing a board game with my son and helped me get a new candy thermometer in the midst of making a batch of this fudge. She ran to her house and grabbed hers but to our dismay HER old candy thermometer was broken too! Somehow her thermometer had solidified, but there were no breaks in the glass – what’s that about?

So, after all that nonsense and my mom being kind enough to drive to the store for a new thermometer, I was ready to start my fudge this year.
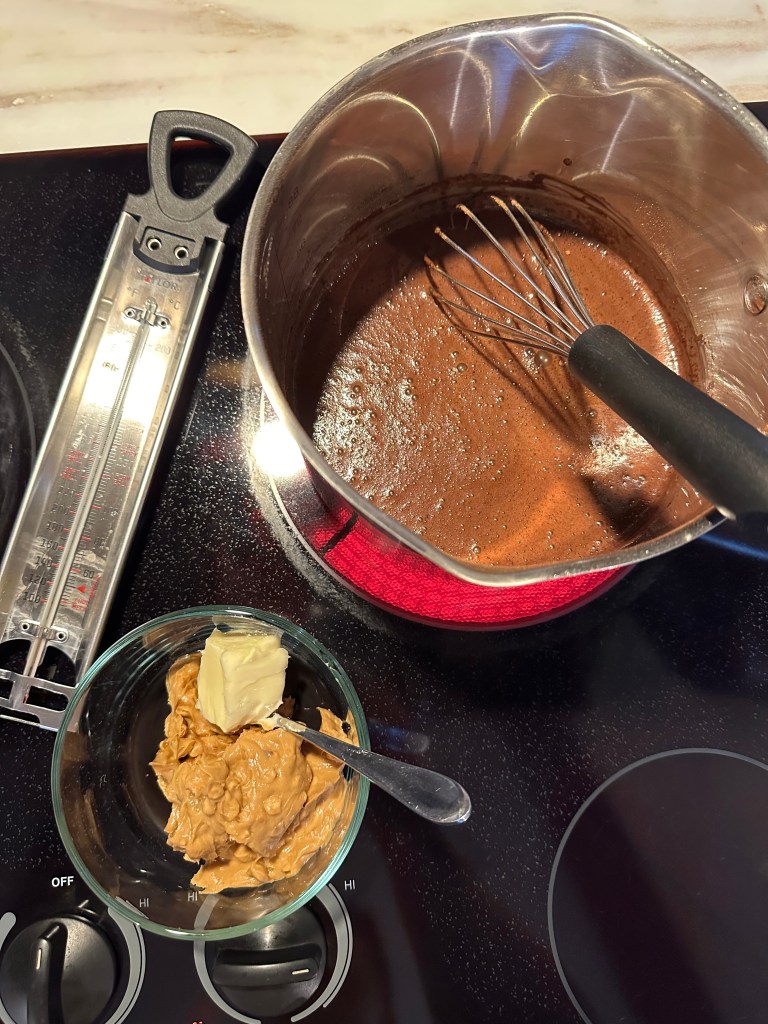
It starts with putting sugar, cocoa and milk into a saucepan. You don’t want to use a small sauce pan because the mixture will boil and you need space to stir without constantly smashing your whisk into the candy thermometer.
I like to stir constantly because it’s not difficult for that mixture to harden, especially behind your candy thermometer if you don’t move it around, so be sure to have your other ingredients prepared before you start your cocoa on the stove!
When you’ve reached soft-ball stage – WHICH MUST NOT BE RUSHED. Let it eat – then proceed!

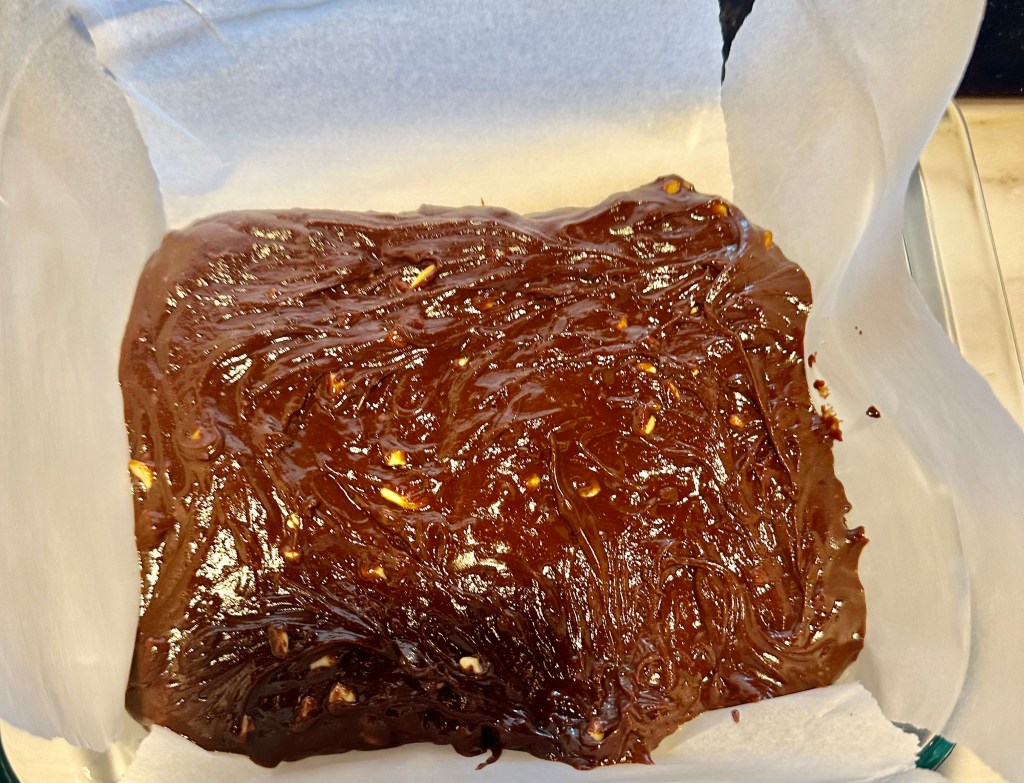
Pull the mixture off the heat once it hits soft-ball stage (238°F) and immediately add the remaining ingredients. Mix thoroughly and pour it directly into your prepared pan. Allow it to cool and then cut and enjoy!
This fudge hits all the right sweet spots for chocolate and peanut butter lovers. It’s creamy and rich, with a crunchy balance if you’d like to add nuts!
INGREDIENTS
– 2 cups (400g) granulated sugar
– 1/3 cup (27g) cocoa
– 1 cup (240g) whole milk (you can use lower fat milk)
– 1 teaspoon vanilla
– 2 Tablespoons unsalted butter
– 1/2 cup peanut butter (choose your favorite)
– 1/2 chopped peanuts (optional – I use crunchy peanut butter to save me a step because work smarter, not harder)
EQUIPMENT
– 8×8 pan
– Parchment paper or cooking spray
– Large saucepan
– Stovetop
INSTRUCTIONS
- Prepare an 8×8 pan with parchment paper or cooking spray, set aside.
- Place sugar, cocoa and milk in a large saucepan. Bring to a boil at soft-ball stage (238°F), using a candy thermometer or the cold-water test to ensure correct temperature.
- At soft-ball stage, remove the pan from heat and immediately add your peanut butter, butter and vanilla. Mix quickly until smooth.
- Pour fudge into prepared pan.
Allow your delicious fudge to cool down prior to cutting.
This fudge is best enjoyed within 3-5 days of creation. Keep it most fresh by storing it in an air-tight container!
Slainte!
Want to peak at the original recipe? Here you go (minus my grandma-in-law’s name for privacy)!

Y’all, I had to do math to find out what the cocoa weighs so please tell me if you care about grams being present!
Hershey’s Natural Unsweetened Cocoa says 1 Tablespoon weighs 5 grams. There are 5.33 Tablespoons in 1/3 cup so 5.33x5g =26.65 g. I like to round up for love so we’re at 27 g.

Leave a comment