Y’all. I have never – repeat, never – received a bad review for these enchiladas. These are my go-to recipe when I need to cook for folks!
My mother, God bless her, always made beef enchiladas with red sauce. I’ve never told her this BUT they were not my favorite dinner. I think my favorite was her chicken and rice, but we’ll get to that one day.
One day when I lived alone and wanted enchiladas, I made this recipe. I don’t remember what prompted it so I don’t have a wild story to tell you but I do remember making them and knowing I’d created a masterpiece. I mean it, they’re delicious!
These enchiladas are simple and require about 50-60 minutes, prep time included.
The ingredients you will need are:
- Green chile enchilada sauce (I cheat and use Las Palmas)
- Tortillas
- Shredded colby jack or Mexican cheese
- Sour cream
- Garlic salt
- Table salt or sea salt
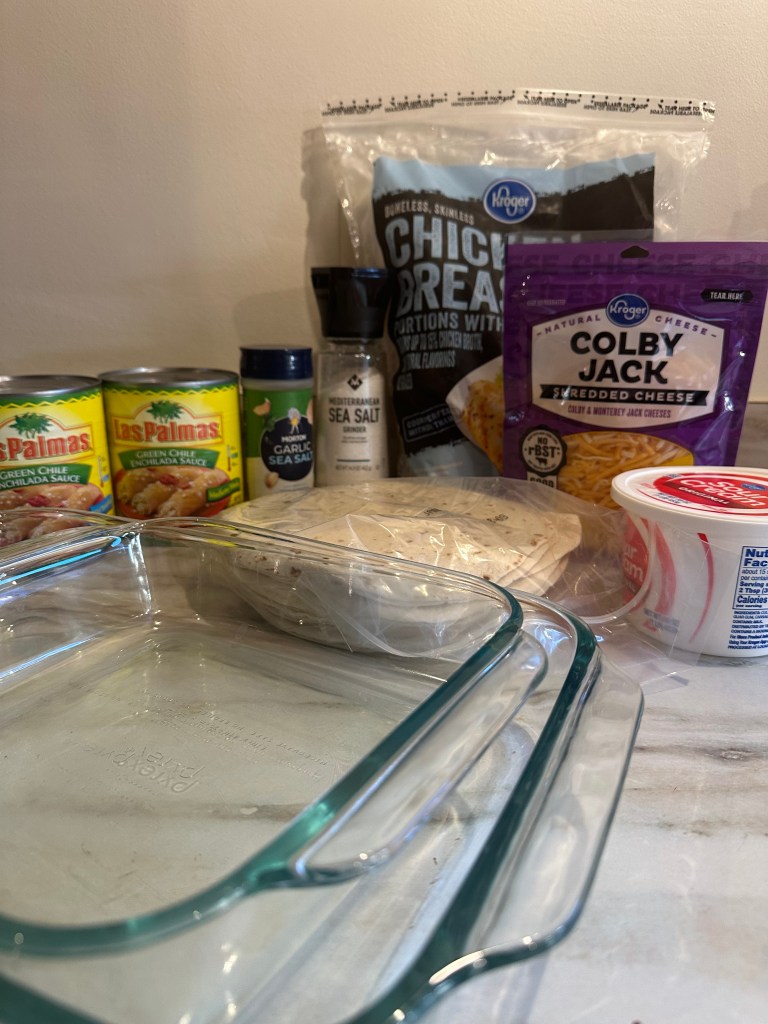
The tools you will need are:
- 2 9×13 pans
- Aluminum foil
- Stockpot for boiling chicken
- Stand mixer (if available) with paddle attachment
So, let’s begin!
Step one, preheat your oven to 375°F.
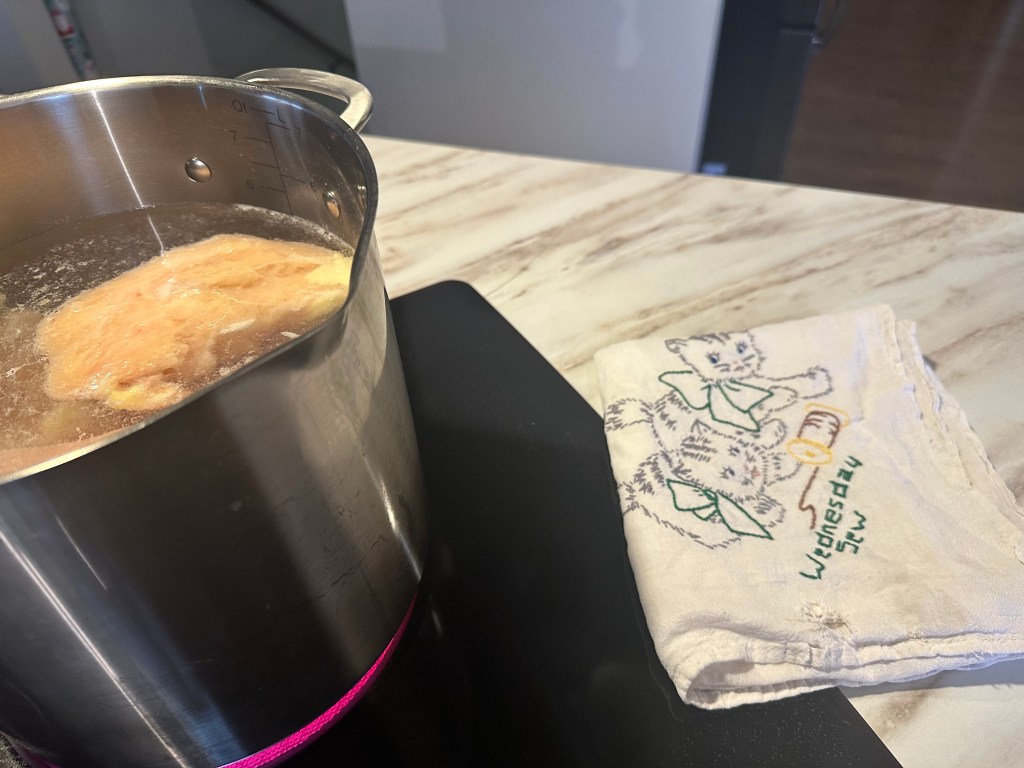
Step two, add water and salt to stockpot then stir to dissolve salt. You’ll want to cover your chicken with at least an inch of water to prevent chicken from lingering at the top and not having space in water to cook evenly. In this photo, I used 4 quarts of water for 3 pounds of chicken. Bring this to a boil and cook chicken through.
What is salted water, you ask? It’s just water with salt that you add yourself! I use fresh ground sea salt or kosher salt. If you add the salt when the water is hot, it will dissolve quicker than if you add it while the water is cold. Either method works, but be sure to stir the water if you add it when it’s cold!
Why boiled chicken? Boiled chicken, in my experience, keeps the chicken moist! Yeah, I said it, moist.
Step three, after ensuring chicken is cooked through, remove it from boiling water and place it in the bowl of your stand mixer. A bit of water will drain off it, that’s totally okay. I typically wait about two minutes for any excess water to drain (and the chicken to cool slightly), drain that excess into your sink.
Can I just say, I don’t like how chicken breasts look when they look like this but have faith. These naked things look better soon!
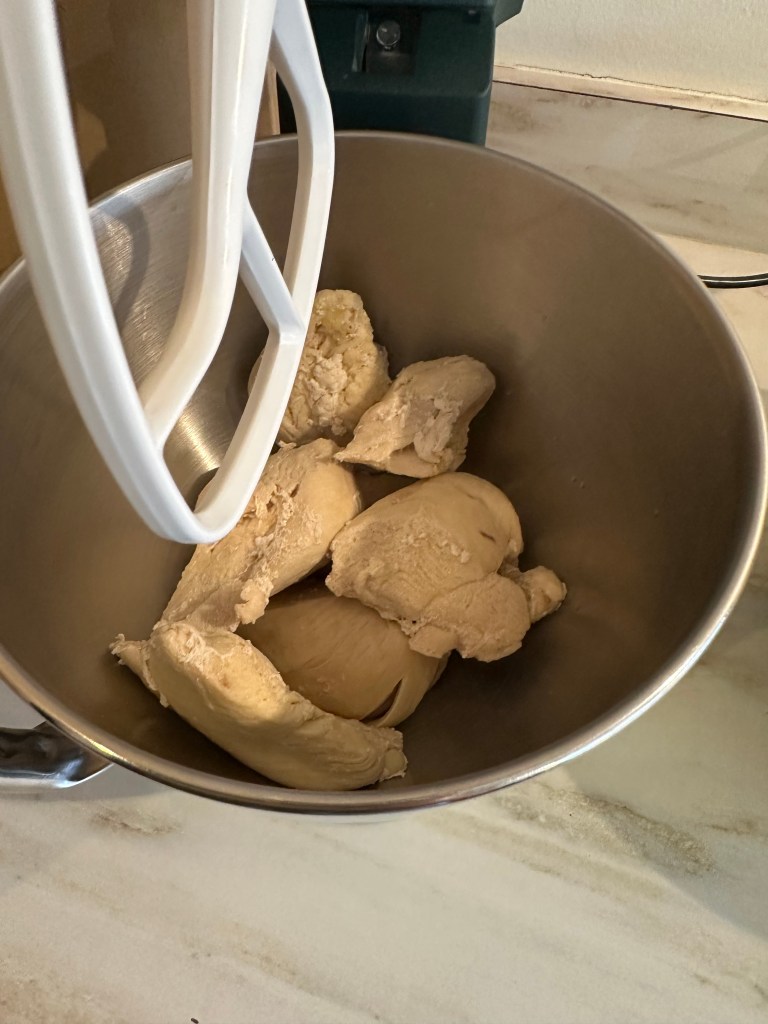
Step four, using your stand mixer on medium speed, shred your chicken. That’s right, you don’t need to burn your fingers like I did before my Kitchen-Aid. Nor do you have to fight with the tines of two forks like they’re mad at each other. A mixer is a glorious tool, glorious.
Step five, add sour cream (yes, the whole thing), about 1 teaspoon of garlic salt (I never actually measure this) and 8 ounces of cheese to bowl – mix it up!
OPTION: If you have someone who does not like shredded cheese, only add sour cream and garlic salt, as seen below. Make their enchiladas first, then add the shredded cheese to your chicken mixture and make the rest.

Tip: Place your needed items right next to each other, in sequential order.

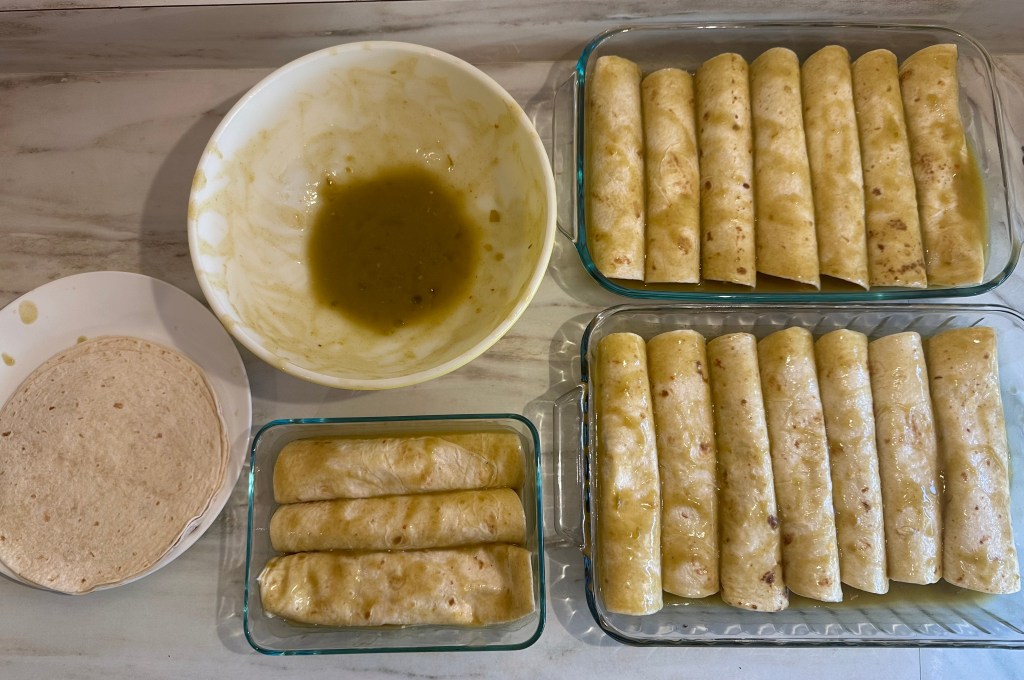
Step six, dip one tortilla (both sides) in the enchilada sauce. Add 1/2 cup of mixture to each tortilla and then roll it closed.
Step seven, place enchilada with the “seam” down in the pan.
Step eight, cover pans with foil and place in preheated oven for 15 minutes.

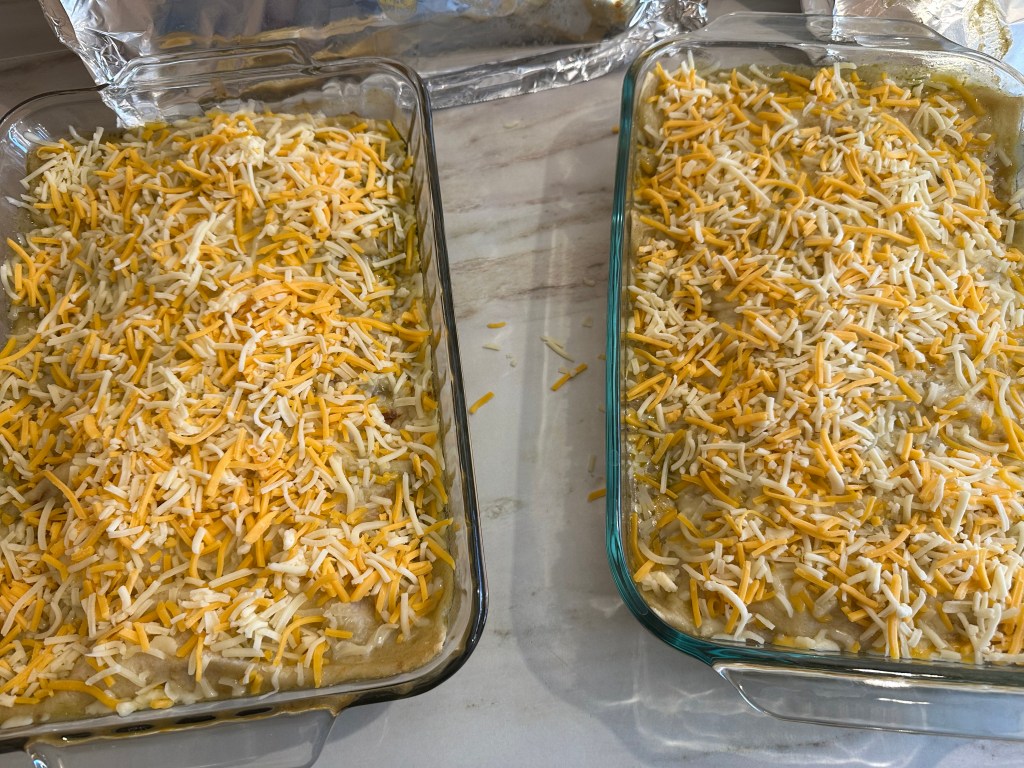
Step nine, after 15 minutes, remove pans from oven and remove foil. Add the remaining 8 ounces of cheese to the top and return to oven for 15 minutes to melt the cheese.

Step ten, remove from oven and enjoy!
These keep and reheat well if covered in an airtight container in the fridge for 3-4 days.
If you’d like to freeze them, complete steps one – seven and cover tightly with plastic wrap then foil (you want to keep it airtight so they don’t get frostbite). When you’re ready to enjoy your enchiladas, you can place them in the oven from frozen. BE SURE TO REMOVE plastic wrap prior to baking.
Slainte!
Ingredients
- 2 – Las Palmas (or your favorite) 28oz Green Chile Chicken Enchilada Sauce
- Tortillas regular size (a large package – we’re making a lot of enchiladas!)
- 2 – 8 oz bag of Colby Jack or Mexican shredded cheese
- 16 oz sour cream
- 1 tsp garlic salt
- Salt
Equipment
- 2 9×13 pans
- Aluminum foil
- Stand mixer, if available
- Stockpot
Instructions
- Step one, preheat your oven to 375°F.
- Step two, add water and salt to stockpot then stir to dissolve salt. You’ll want to cover your chicken with at least an inch of water to prevent chicken from lingering at the top and not having space in water to cook evenly. In this photo, I used 4 quarts of water for 3 pounds of chicken. Bring this to a boil and cook chicken through.
- Step three, after ensuring chicken is cooked through, remove it from boiling water and place it in the bowl of your stand mixer. A bit of water will drain off it, that’s totally okay. I typically wait about two minutes for any excess water to drain (and the chicken to cool slightly), drain that excess into your sink.
- Step four, using your stand mixer on medium speed, shred your chicken. That’s right, you don’t need to burn your fingers like I did before my Kitchen-Aid. Nor do you have to fight with the tines of two forks like they’re mad at each other. A mixer is a glorious tool, glorious.
- Step five, add sour cream (yes, the whole thing), about 1 teaspoon of garlic salt (I never actually measure this) and 8 ounces of cheese to bowl – mix it up!
- Step six, dip one tortilla (both sides) in the enchilada sauce. Add 1/2 cup of mixture to each tortilla and then roll it closed.
- Step seven, place enchilada with the “seam” down in the pan.
- Step eight, cover pans with foil and place in preheated oven for 15 minutes.
- Step nine, after 15 minutes, remove pans from oven and remove foil. Add the remaining 8 ounces of cheese to the top and return to oven for 15 minutes to melt the cheese.
- Step ten, remove from oven and enjoy!

Leave a comment